You can use Prowl in versions of Growl 1.1 and later.
Growl 2.x
Prowl is included in Growl 2.0 and above! You don't need to install anything; you just need to set up the plugin.
-
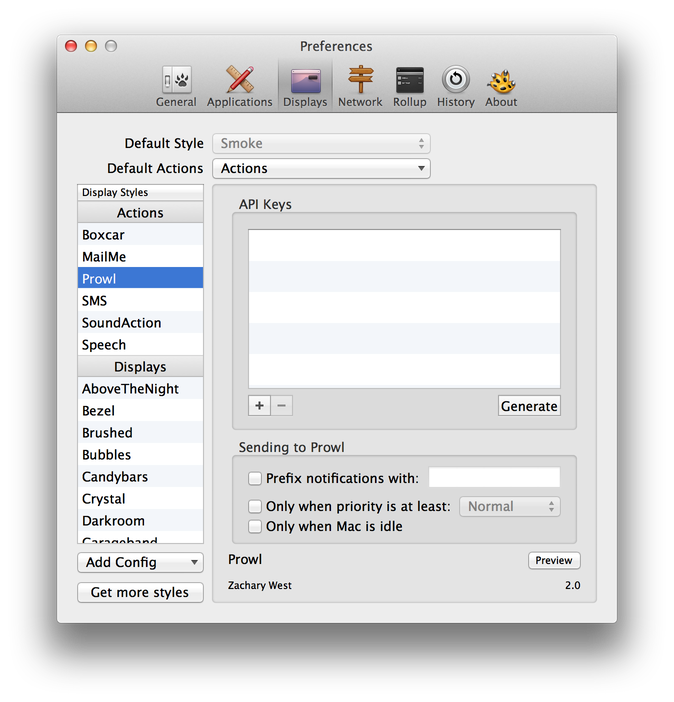
Go to the Displays preferences in Growl and select Prowl on the left under Actions.
-
Click on the Generate button to add an API key to Growl and log into your Prowl account.
-
Under the Default Actions option on the top, click on "Prowl".
Growl 1.1.x
Really there's just a few easy steps, don't be discouraged by the pictures. You'll get it, I'm sure. Don't forget to set your default style to Prowl when you're done!
There are two components to Prowl: the application running on your iOS device, and the Growl plugin. Installing the Growl plugin on your Mac only takes a few steps.
If you're looking for information for setting up Growl for Windows, head to the FAQ.
Prerequisites
You need a few things before you get started:
- Register for a Prowl account on the register page.
- Log into Prowl on your iOS device.
- Make sure you have Growl installed and that it's the latest version.
Installing the Growl plugin
Download the Growl plugin, version 1.1 (history)
This version is fully compatible with Growl 1.1.x–1.4.x. Prowl is included in Growl 2.0.
If you need to, run it after it downloads. You'll find a volume mounted that looks like this:
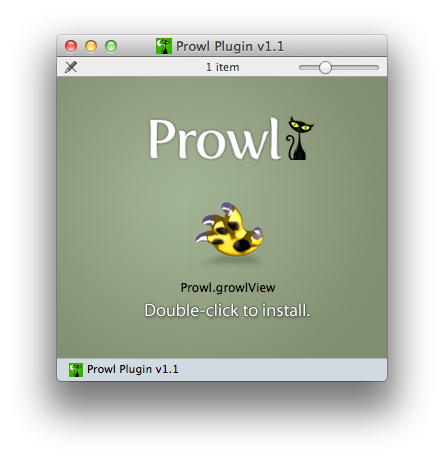
Double-click Prowl.growlView; Growl will install it for you. You should see a dialog like this:
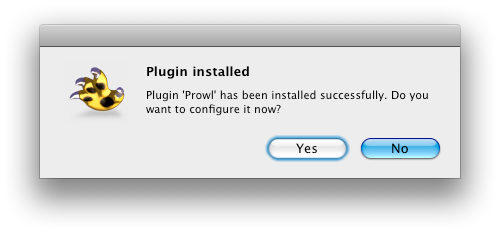
Click "Yes" and Growl will open its preferences. If you don't see the dialog, you need to install Growl, or you may need to restart your machine if you've recently updated Growl to the Mac App Store version.
Setting up the Growl plugin
Prowl's settings can be found in:
- Growl
- Display Options
- Prowl (in the left-hand side list)
- Display Options
The first time you install the plugin, Growl should take you directly to it.
Prowl's preferences inside Growl should look something like this:
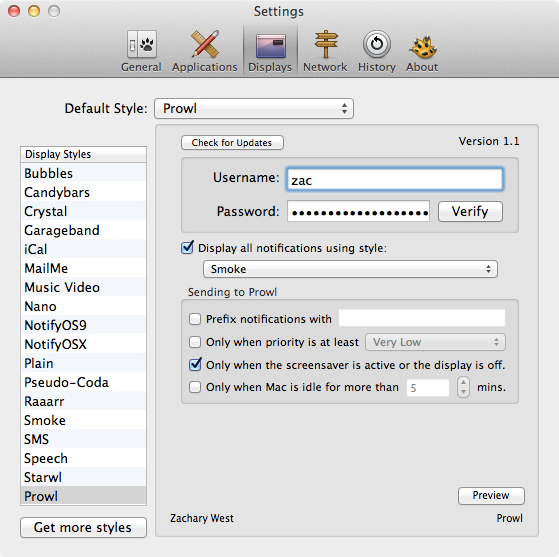
Enter your Prowl username and password into the Prowl preferences. Click the Verify button when you're done, and your password will be checked for you. You should see confirmation that looks like this:

With your information set in the plugin, any events which are set to use the Prowl display style will be sent to the Prowl server. You can set an individual style from the main "Applications" menu inside Growl:
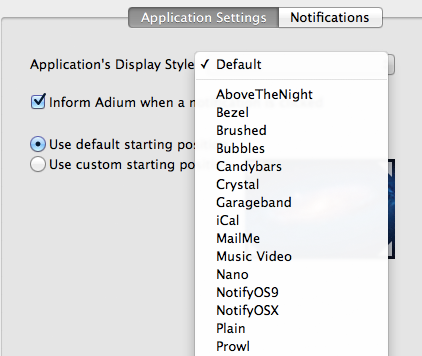
You can also set Prowl to be your global style from the "Display Options" preference: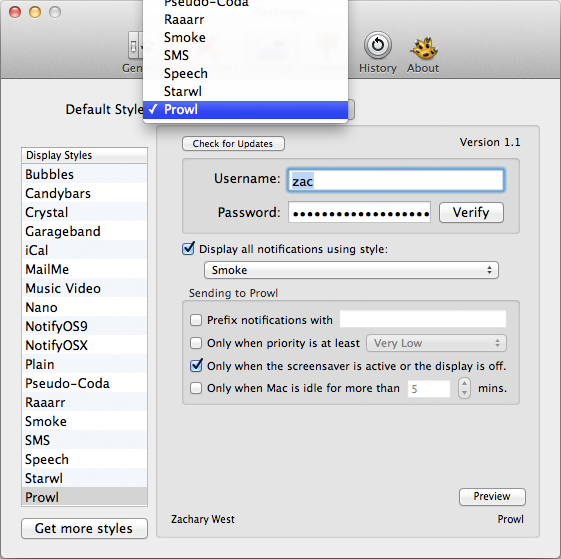
The global style setting is your best bet. It causes all notifications inside Growl to be sent through Prowl, which is almost always what you want. You can tell Prowl how to limit what it sends via its plugin preferences.
Plugin Version
This is version 1.1 of the Growl plugin, which has an SHA-1 hash of
488d828528ed1522c40dd8b419d39f211d52e60a.- Version 1.1 changes:
- Support for a forthcoming upgrade to Growl.
- Add "…or display is off" to the "only when screensaver is active" preference.
- Version 1.0.4 changes:
- Added a "prefix" option which is used when sending notifications to Prowl.
- Added "only send to Prowl when the screensaver is active" preference.
- Fixed the default "redirect" style saying "Smoke" but actually not doing anything.
- Version 1.0.3 changes:
- Now stores the password so updates can still work after the keychain is locked.
- Silently sends priority for use in future versions of the Prowl application.
- Added Sparkle for update checking on the Prowl view.
- Compiled as a 32-bit/64-bit binary for support with future operating systems.
- Version 1.0.2 changes:
- Made Keychain errors much more visible and verbose.
- Version 1.0.1 changes:
- Added some more logging for password save errors.
- Fixed setting a Priority inside Growl and Prowl ignoring it.